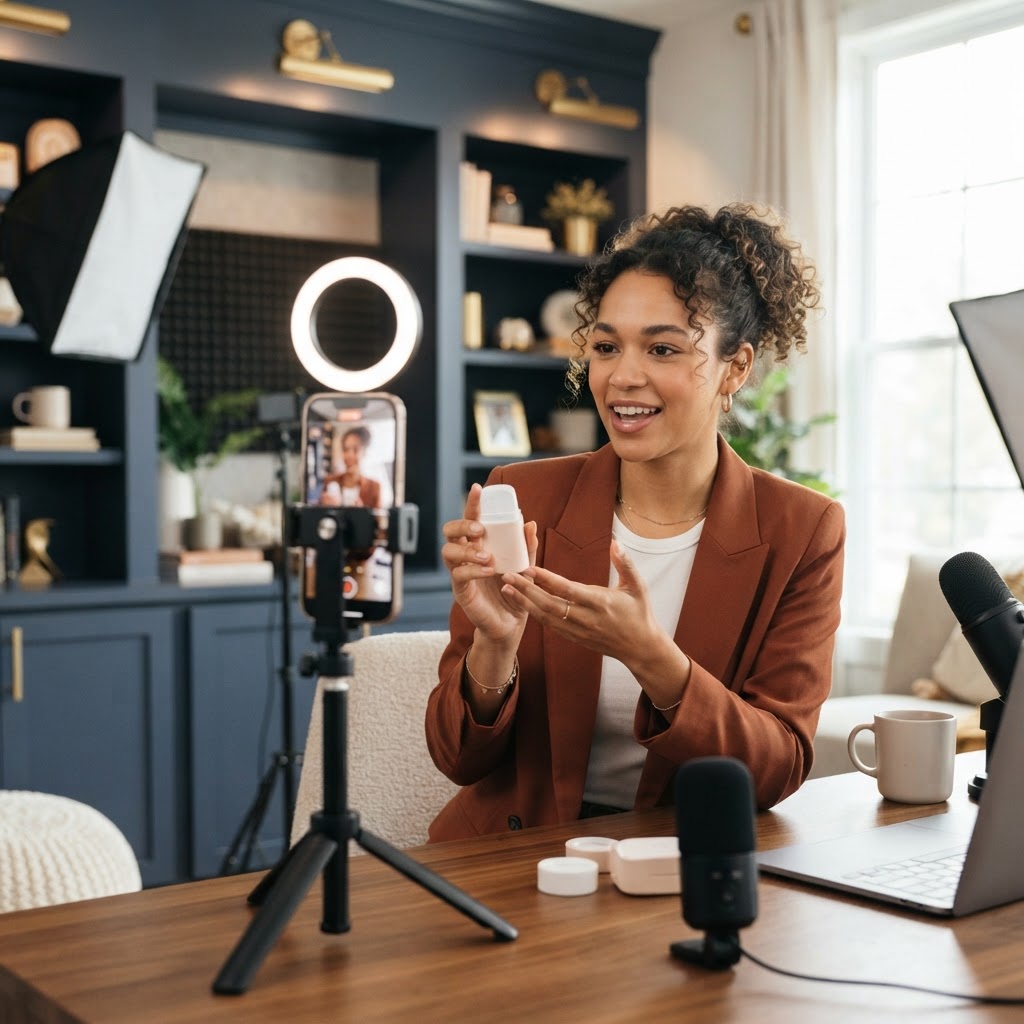
How to Film Professional-Looking Business Videos With Your iPhone

Here is how to film with iPhone so your business videos look professional: use the rear camera, set it to 4K at 30 frames per second, lock your focus and exposure, face a window or soft light, and put a small microphone close to your mouth. Keep the phone steady on a tripod at eye level and frame yourself in vertical 9:16. Those few steps fix most of what makes phone video look cheap.
If you are a business owner, you probably already know you should be posting video. The problem is that your clips look dark, sound echoey, or feel shaky, so you delete them or never post at all. This guide on how to film with iPhone walks you through exactly what to change, so you can stop wasting shoots and start posting content that makes people trust you.
Key Takeaways
- Your iPhone is good enough. Most "amateur" looking video comes from bad light, bad sound, and shaky framing, not the phone.
- Use the rear camera when you can, set to 4K at 30 fps, and lock focus and exposure before you hit record.
- Sound matters more than picture. A small wireless or clip-on mic is the single best upgrade for talking videos.
- Face your light source. A window in front of you beats any expensive camera in a dark room.
- Shoot vertical (9:16), keep your eyes in the top third of the frame, and leave room for captions.
- Plan several videos per session so one setup gives you a week or a month of posts.
Why Your iPhone Videos Look Amateur (and What Actually Fixes It)
Most owners blame the phone. In our experience filming for 350+ brands and creators, the phone is almost never the problem. Modern iPhones shoot sharp 4K video. What ruins the clip is everything around the phone.
Here are the five most common problems we see, in order of how much they hurt your video:
- Bad audio. Echo, wind, traffic, or a voice that sounds far away. People will forgive slightly soft video, but they scroll away from bad sound fast.
- Bad light. A window behind you turns you into a dark shadow. Overhead office lights make tired-looking eyes.
- Shaky framing. Holding the phone in one hand while talking creates small wobbles that feel unprofessional.
- Wrong framing. Your head is cut off, or there is a huge empty space above you, or the phone is pointing up your nose.
- Focus and exposure jumping. The iPhone keeps re-adjusting while you move, so the picture pulses brighter and darker.
Fix these five and your videos will look like they came from a small production team. You do not need a cinema camera, a film degree, or a big budget.
How to Film With iPhone: Best Video Settings for Reels and TikTok
Before you film anything, spend five minutes in your settings. Apple moves menu names around from time to time, so treat this as a guide and look for the closest match on your phone. As of 2026, most of these live under Settings > Camera > Record Video and Settings > Camera > Formats.
Resolution and frame rate
For talking videos, Reels, and TikToks, we recommend 4K at 30 fps. It looks sharp, plays smoothly, and keeps file sizes manageable. Use 4K at 60 fps if you are filming movement, like a workout, a product spinning, or a walk-through, and want the option to slow it down later. If storage is tight, 1080p at 30 fps is still fine for social media, since the apps compress your video anyway.
Try to pick one frame rate and stick with it for a whole shoot. Mixing 30 fps and 60 fps clips in the same edit can create small stutters.
Format: High Efficiency vs Most Compatible
Under Formats, "High Efficiency" saves space and is what most people should use. "Most Compatible" creates bigger files that open on almost any computer. If your editor ever says your files will not import, switch to Most Compatible for that shoot.
HDR Video
HDR makes highlights brighter and colors richer on your iPhone screen. The catch is that HDR footage can look washed out or overly bright once it is uploaded or edited in some apps. If your videos look different on Instagram than they did on your phone, try turning HDR Video off and compare. Many creators keep it off for social content to get more predictable results.
Helpful extras to turn on
- Grid (Settings > Camera > Grid): shows lines that help you keep the frame level and place your eyes correctly.
- Lock White Balance (if your model shows it under Record Video): stops colors from shifting warm and cool mid-clip.
- Lock Camera (if available): stops the iPhone from switching lenses on its own while you record, which can cause a sudden jump in the picture.
- Enhanced Stabilization or Action mode: helpful when you are walking or moving. Action mode crops the image and works best in good light, so do not use it for a seated talking video.
Pro models: ProRes and Log
If you have an iPhone Pro, you may see options like ProRes and Apple Log. These are made for heavy color editing and create very large files. For most business owners posting Reels, they add work without adding much value. Leave them off unless you or your editor have a specific reason to use them.
Rear Camera vs Front Camera: Which Should You Use?
The rear camera has historically been the better camera, with better lenses and sensors. The downside is you cannot see yourself while you talk. The front camera lets you check your framing, which helps nervous first-timers a lot.
Newer models have closed the gap. Apple says the iPhone 17 lineup has an upgraded front camera with a wider square sensor and stabilized 4K HDR video, plus a Dual Capture feature that records from the front and back cameras at the same time. That makes the front camera a much more practical choice than it was a few years ago. Features vary by model and change every year, so check what your phone supports.
Our simple rule:
- Rear camera when you have a helper, a fixed tripod setup, or you are filming products, your space, or your team at work.
- Front camera when you are filming alone and need to see yourself, or you have a newer iPhone with an improved front camera.
If you use the rear camera alone, set up your frame first, mark where you stand with a piece of tape on the floor, and record a 5-second test before every batch of videos.
Lighting: The Fastest Way to Look Professional
Light is where most owners see the biggest jump in quality for the least money. You do not need to understand lighting theory. You just need to follow three rules.
Rule 1: Face the light. Stand or sit facing a window so daylight falls on your face. Never film with a bright window behind you.
Rule 2: Make it soft. Direct sun creates harsh shadows. A cloudy day, a window with a sheer curtain, or a light with a diffuser panel gives smooth, flattering light.
Rule 3: Keep it consistent. Daylight changes every few minutes. If you film for an hour by a window, your first and last clips will look different. For long sessions, a simple LED panel or softbox is more reliable.
If you want to buy gear, a small LED panel or a softbox on a stand placed slightly to one side of the camera, about at eye level, is a great start. We break down the options in our guide to the best lighting and mic for talking-head videos.
Quick lighting checklist
- Turn off overhead lights if they create shadows under your eyes.
- Turn off mixed lights (a warm lamp plus cool daylight makes odd skin tones).
- Pull yourself a few feet away from the wall to avoid a hard shadow behind you.
- Check your eyes. If you can see a small reflection of the light in them, you are lit well.
Sound: The Upgrade Most Owners Skip
Here is the honest truth: people will watch a slightly soft video with clear sound, but they will scroll away from a sharp video with bad sound. The iPhone's built-in mic is fine for quick clips close to your face. Once you are more than an arm's length away, or in a room with hard walls, your voice starts sounding hollow.
The fix is a small microphone close to your mouth. Your options:
- Wireless clip-on mic systems (popular examples include the DJI Mic series and RODE Wireless GO style kits). A tiny transmitter clips to your shirt and sends audio straight to your phone. This is what we recommend for most owners.
- Wired lavalier mics that plug into the phone. Cheaper and reliable, but you are tied to the phone by a cable.
- Small on-phone shotgun mics. Good for vlogging and run-and-gun clips, less ideal for seated talking videos.
Newer iPhones also include sound features like wind noise reduction and, on some models, an Audio Mix option that can help bring voices forward after recording. These are helpful, but they do not replace putting a mic close to your mouth.
Room fixes that cost nothing
- Film in a room with soft things: couches, rugs, curtains, bookshelves.
- Close windows and turn off fans, AC, and fridges if you can.
- Put your phone on Do Not Disturb or Airplane Mode so calls and alerts do not ruin a take.
- Record 10 seconds of silence at the start of each session. Your editor can use it to clean up background noise.
Framing and Stability: Look Like You Planned It
Use a tripod or stand
A phone tripod with a phone clamp is one of the cheapest upgrades you can make. It removes shake, keeps your framing the same across videos, and frees your hands so you can talk naturally. A tabletop tripod works for desk videos. A full-height tripod is better for standing videos.
Frame vertical and at eye level
Reels, TikTok, and YouTube Shorts are vertical, so film in 9:16 (hold the phone upright). Put the lens at your eye level. A lens below your chin points up your nose and feels unflattering. A lens far above you makes you look small.
Follow the "eyes in the top third" rule
Turn on the grid. Place your eyes on or near the top horizontal line. Leave a small gap above your head, not a huge one. Remember that platform buttons, captions, and your username will cover parts of the screen, especially the bottom and right side, so keep important things near the center.
Lock focus and exposure
In the Camera app, tap and hold on your face until you see "AE/AF Lock." Then slide the sun icon up or down to brighten or darken the shot. This stops the iPhone from pulsing brighter and darker while you move your hands or shift in your seat.
Clean the lens
It sounds silly, but a fingerprint on the lens is one of the most common reasons phone footage looks foggy. Wipe it with a soft cloth before every shoot.
A Simple Shot List for Business Videos
Professional videos rarely use one long shot. They mix a main talking shot with short extra clips (often called B-roll) that show what you are talking about. Here is a shot list you can use for almost any business:
- Main talking shot: you, at eye level, explaining one idea.
- Close-up of hands at work: cutting hair, writing a contract, mixing a drink, fixing a pipe.
- Wide shot of your space: the shop, office, gym, or job site.
- Product or result shots: the finished work, the before and after, the plate of food.
- Customer interaction (with permission): a handshake, a consultation, a smile at the counter.
- Detail shots: your sign, your logo, tools, packaging.
- Walking shot: you walking into the building or through the space, filmed with Action mode or stabilization on.
Film 5 to 10 seconds of each B-roll shot, steady, without zooming. Your editor can cut them over your talking clips to keep people watching.
How to Film a Week or Month of Videos in One Session
Setting up lights, mic, and tripod takes time. The smartest way to use that setup is to film many videos at once. This is called batching, and it is how we film a month of content for clients in a single shoot day.
Here is a simple batch plan:
- Write 8 to 12 short scripts or bullet outlines before the shoot. Each one should cover a single idea.
- Write a strong first line for each. The first few seconds decide whether people keep watching. See our guide on how to write a hook for short-form video.
- Set up once. Light, mic, tripod, framing, test clip.
- Film all talking videos back to back. Pause between each so your editor has clean cut points.
- Change your shirt between groups of videos if you want them to look like different days.
- Film all B-roll at the end in one sweep of your space.
- Back up the footage to cloud storage or a computer the same day.
If you want the full playbook, read what a content shoot day is and how we structure ours.
Common Mistakes to Avoid
- Using digital zoom. Pinching to zoom lowers quality. Move the phone closer instead, or switch to another lens before recording.
- Forgetting to check the mode. Make sure you are in Video mode, not Photo, Portrait, or Slo-Mo, before you start talking.
- Recording in the native camera, then filming again inside Instagram. Film in the Camera app for best quality, then upload.
- Ignoring storage. 4K files are large. Clear space before a shoot so you do not run out in the middle of your best take.
- Low battery. Plug the phone into a power bank during long sessions. Phones can also get hot in direct sun and dim the screen or stop recording.
- One take only. Do two or three takes of each video. The second take is usually more relaxed.
- Reading off the screen with your eyes moving. If you use a teleprompter app, keep the text small and close to the lens so your eyes do not wander.
If being on camera makes you freeze up, you are not alone. Start with short videos, do a few warm-up takes you never plan to post, and talk to the lens like it is one friendly customer. Confidence comes faster than you think once you have filmed a few batches.
Your Pre-Shoot Checklist
Print this, screenshot it, or tape it to your tripod:
- Lens wiped clean
- Phone charged, on Do Not Disturb, enough storage free
- 4K at 30 fps set (or 60 fps for movement)
- Grid on, HDR checked
- Facing the light, overhead lights adjusted
- Mic clipped on, test recording played back with headphones
- Phone at eye level on tripod, vertical, eyes in top third
- Focus and exposure locked on your face
- Scripts or bullet points ready
- Water nearby, phone notifications off
Frequently Asked Questions
What are the best iPhone video settings for Reels?
For most Reels, use 4K at 30 fps on the rear camera, with focus and exposure locked on your face. Use 4K at 60 fps if there is a lot of movement. If your uploads look too bright or washed out, try turning HDR Video off. Apple changes menu names over time, so look under Settings > Camera for the closest match.
Can you really film professional reels on a phone?
Yes. Many of the polished Reels and TikToks you see from businesses are filmed on phones. What makes them look professional is good light, clear sound, a steady frame, and tight editing. The phone itself is rarely the weak link.
Should I film with the front or back camera on my iPhone?
The rear camera has traditionally given better quality, so use it when someone can help you frame or when you film products and spaces. The front camera is easier when filming alone, and newer models like the iPhone 17 lineup have improved it a lot. Test both on your phone and pick the one that looks better in your space.
Do I need a microphone to film with my iPhone?
For quick clips filmed close to your face in a quiet room, the built-in mic can work. For talking videos, interviews, or anything filmed more than an arm's length away, a small clip-on or wireless mic makes a huge difference. Clear sound keeps people watching longer.
Is 4K necessary for Instagram and TikTok?
Not strictly. The apps compress video, and 1080p can look fine. We still recommend 4K because it gives your editor room to crop or punch in without losing sharpness, and it holds up better after compression.
How do I stop my iPhone video from changing brightness while recording?
Tap and hold on your face in the Camera app until "AE/AF Lock" appears. That locks focus and exposure. Then slide the sun icon to adjust brightness before you start talking.
Want Us to Film It for You?
Learning how to film with iPhone is a great skill, and the steps above will lift the quality of everything you post. But if your real problem is time, the fastest fix is to hand off the whole process. At Social Content Masters, we script, film, edit, and post your short-form videos, and we film a month of content in one shoot day.
Prefer to keep filming yourself? Our Editing Basics plan turns your raw footage into finished reels. Or book a free content strategy session and we will map out what to film, how to film it, and how to turn it into customers.
Want content like this made for your brand?
We script, film, edit, and post. You get your time back.
Book a Consultation