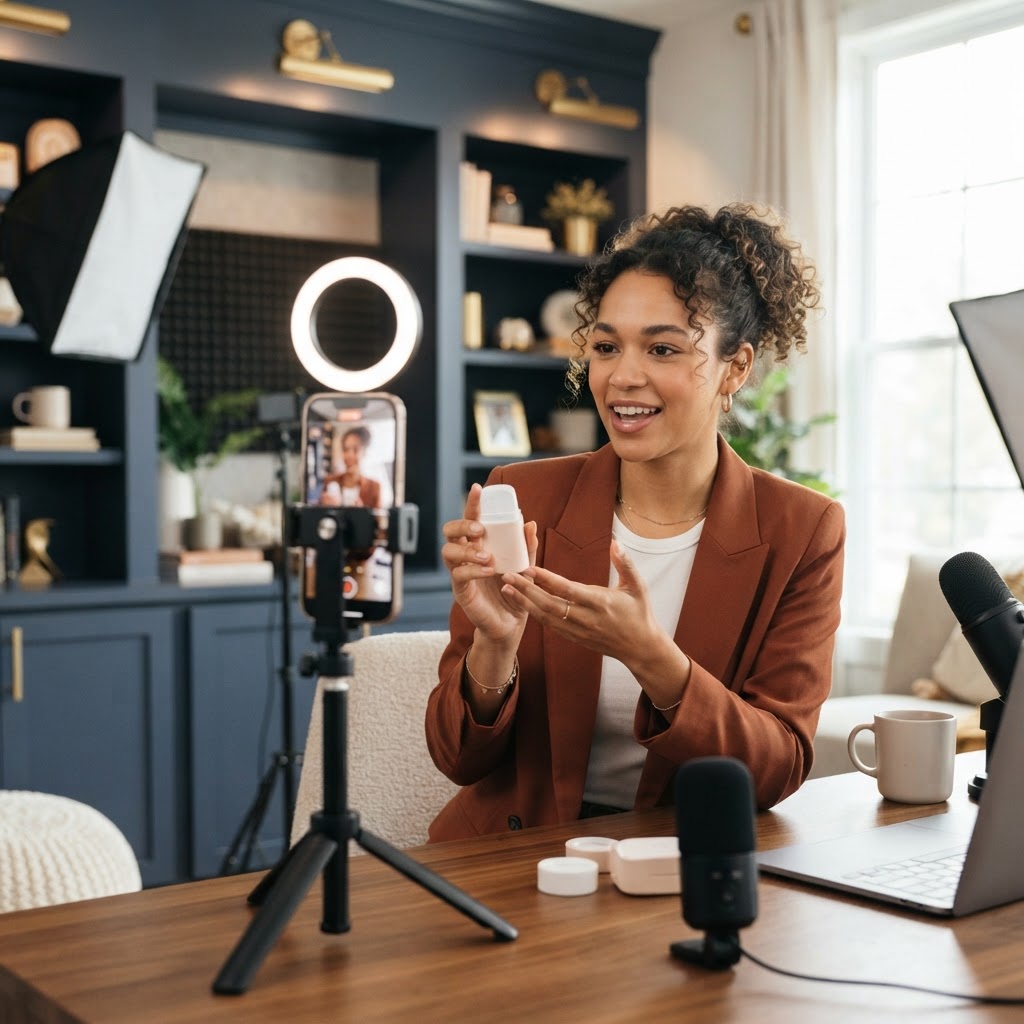
Best Lighting and Microphone Setup for Talking-Head Videos

The best setup for talking-head videos is one soft key light (a softbox or LED panel with a diffuser) placed slightly to the side of your camera at eye level, plus a small wireless clip-on microphone. Add a second light or a lamp behind you for depth if you have room. That two-piece kit fixes the dark, echoey look that makes most business videos feel amateur.
This matters because your videos are often the first time a customer sees and hears you. If the picture is murky or the sound is hollow, people scroll away before you get to the good part. Below we cover recommended lighting kits for phone video recording, the best mic for iPhone video, and the ring light vs softbox question, all in plain language with no gear jargon.
Key Takeaways
- Sound first, light second. A clear voice keeps viewers watching even when the picture is not perfect.
- One good soft light beats three cheap harsh ones. Start with a single softbox or diffused LED panel.
- Ring lights are fine for close-up beauty and makeup shots, but softboxes usually look more natural for talking-head videos.
- Wireless clip-on mics are the easiest and most reliable upgrade for most owners filming on a phone.
- Place your light slightly to one side at about eye level, and keep your mic within a hand's length of your mouth.
- Buy once, set up once, and film many videos in one session to get the most from your gear.
Why Light and Sound Matter More Than Your Camera
Owners often think they need a better camera. In most cases, they need better light and better sound. A modern phone in a well-lit, quiet room will out-perform an expensive camera in a dim, echoey office.
Here is why:
- Phones struggle in low light. When there is not enough light, the phone boosts brightness digitally, which adds grain and smudgy detail.
- Phone mics hear the whole room. The built-in mic picks up echo, the air conditioner, and the street outside, which makes your voice sound far away.
- Viewers judge quality in seconds. On Reels and TikTok, people decide fast whether to keep watching. Clear sound and a well-lit face signal "this person is worth listening to."
The good news is that both problems are cheap to fix compared to buying new cameras.
The Simple Setup We Recommend for Most Business Owners
If you want one answer, this is the setup we point most owners to. It works in an office, a spare room, a salon chair, or behind a counter.
- One key light. A softbox or LED panel with a diffuser, on a stand, placed about 45 degrees to one side of your phone, slightly above eye level, pointing down at your face.
- One wireless clip-on mic. Clipped to your shirt about a hand's width below your chin.
- One tripod or phone stand. Holding the phone vertical, lens at eye level.
- Optional fill. A second, dimmer light or a white wall on the other side to soften shadows.
- Optional background light. A small lamp, LED strip, or tube light behind you to separate you from the wall.
That is it. You can film hundreds of videos with that kit. Of all the recommended lighting kits for phone video recording out there, a simple one-light setup like this is the one most owners will actually keep using. Everything else is a nice-to-have.
Recommended Lighting Kits for Phone Video Recording
There are four main types of lights you will see when shopping for recommended lighting kits for phone video recording. Here is what each one does well and where it falls short.
Softboxes
A softbox is a light inside a fabric box with a white front panel. The panel spreads the light out so it wraps around your face softly. Softboxes are one of the most flattering options for talking-head videos and are often sold in pairs with stands.
- Good for: talking-head videos, interviews, seated content, offices and studios.
- Watch out for: they take up floor space and can be bulky to pack. Pick a kit with LED bulbs, not hot old-style bulbs, so your room does not heat up.
LED panels
LED panels are flat, rectangular lights. Many let you adjust brightness and color (from warm to cool). Small panels can sit on a desk; larger ones go on a stand. Well-known examples include the Elgato Key Light, Neewer LED panels, and Aputure or Amaran panels.
- Good for: desk setups, small spaces, people who want adjustable color to match their room.
- Watch out for: a bare panel can look harsh. Add a diffuser or bounce it off a white wall for a softer look.
Ring lights
A ring light is a circle of LEDs with your phone mounted in the middle. It lights your face evenly from the front and creates the round reflection in your eyes that you see in a lot of beauty content.
- Good for: close-up beauty, makeup, skincare, nails, quick selfie-style clips.
- Watch out for: front-on light can flatten your face, and people with glasses often get a big ring reflection in their lenses.
Small on-camera or pocket lights
Tiny LED lights that clip onto your phone or sit in your pocket. Handy when you film on the go.
- Good for: run-and-gun clips, job sites, events, adding a little light in a dark spot.
- Watch out for: they are small and close to the camera, so they can look harsh. Use them as a backup, not your main light.
What to look for in any light
- Brightness control (dimming). You will almost always want to turn it down or up.
- Color control or a daylight setting. Matching your light to your room avoids odd skin tones.
- A good stand. Tall enough to put the light above eye level, steady enough not to tip.
- Quiet operation. Some lights have cooling fans. Make sure yours is quiet enough for your mic not to pick it up.
- Power options. Plug-in is fine for a fixed spot. Battery power helps if you film in different places.
Ring Light vs Softbox: Which Is Better?
This is one of the most common questions we get. Short answer: for most business talking-head videos, a softbox (or diffused LED panel) placed to the side looks more natural and professional. A ring light is great for specific close-up beauty content.
Here is how they compare in plain terms:
- Look: A ring light gives flat, even, front-on light. A softbox to the side gives soft shadows that show the shape of your face, which looks more like a real studio.
- Glasses: Ring lights often create a bright circle on glasses. A softbox placed off to the side is much easier to hide from your lenses.
- Space: Ring lights are compact and easy to move. Softboxes need more room.
- Ease: A ring light is almost foolproof for a beginner. A softbox takes a few minutes of testing to place correctly.
- Best use: Ring light for makeup tutorials, nail close-ups, quick selfie videos. Softbox for coaching, explaining, consulting, interviews, and most "talk to the camera" content.
If you already own a ring light, you do not need to throw it out. Try moving it off to the side instead of directly in front of you. Many people find that one change makes it look a lot more natural.
How to Place Your Light (Step by Step)
Buying a light is the easy part. Placing it well is where the quality comes from. Here is a simple process:
- Turn off overhead lights if they cast shadows under your eyes. Leave a lamp on in the background if it adds warmth.
- Put your phone on the tripod at eye level, vertical, where you plan to film.
- Place your key light about 45 degrees to one side of the phone and a little higher than your eyes, angled down toward your face.
- Move the light closer for softer light, farther for harder light. Closer and bigger looks softer and more flattering.
- Check the shadow side of your face. If it is too dark, add a dim second light, a reflector, or move closer to a white wall on that side.
- Move yourself away from the wall by a few feet so your shadow does not land right behind you.
- Add a background light if you look flat against the wall. A warm lamp or a colored LED strip adds depth.
- Check your eyes in the preview. A small reflection of the light (called a catchlight) makes you look alive and engaged.
- Lock exposure on your face in the camera app so the brightness does not shift mid-video.
Using window light for free
If you have a big window, you already have a great light. Sit facing the window or at a slight angle to it. Avoid direct sun; a cloudy day or sheer curtain is perfect. The downside is that daylight changes, so long sessions can drift in color and brightness. That is when a softbox or LED panel pays for itself.
Best Mic for iPhone Video
Microphones matter even more than lights. Here are the main options for phone filming, from most recommended to least for typical talking-head videos.
Wireless clip-on (lavalier) mic systems
A small transmitter clips to your shirt and sends sound wirelessly to a receiver plugged into your phone. Well-known examples include the DJI Mic series, RODE Wireless GO kits, and Hollyland Lark mics. Many kits come with two transmitters, which is great for interviews or two-person videos.
- Why we like them: clear voice, freedom to move, quick setup, and they work across phones and cameras.
- Watch out for: battery life, and making sure the receiver matches your phone's port.
Wired lavalier mics
A small mic on a cable that plugs into your phone.
- Why people like them: reliable, no batteries to charge on many models, and usually the lowest-cost option.
- Watch out for: you are tied to the phone by a cable, and the cable can rub on clothing and make noise.
On-phone shotgun mics
A short mic that plugs into the phone and points forward at you.
- Why people like them: nothing to clip on, good for vlogging and walk-and-talk clips.
- Watch out for: they pick up more of the room than a clip-on mic, so they work best when you are close to the phone.
Desktop USB mics
Common in podcasting. Some can connect to a phone, but they are usually best for desk recording and voiceovers rather than video where you move around.
Check your phone's port
Newer iPhones (iPhone 15 and later, as of 2026) use USB-C. Older models use Lightning. Most wireless kits include receivers or adapters for both, but double-check before you buy. Some mics also connect over Bluetooth, but Bluetooth audio can be lower quality or slightly out of sync, so a plug-in receiver is the safer choice for important content.
How to Get Great Sound (Even With a Cheap Mic)
Your room matters as much as your mic. Use these quick fixes:
- Mic placement: clip it about a hand's width below your chin, in the center of your chest. Keep hair, necklaces, and jacket zippers away from it.
- Use a windscreen (the small furry cover) when filming outside.
- Pick a soft room. Rugs, couches, curtains, and bookshelves soak up echo. Empty rooms with hard floors sound hollow.
- Kill background noise. Turn off fans, AC, and noisy appliances while recording.
- Set your phone to Do Not Disturb so calls and notifications do not interrupt.
- Test and listen with headphones. Record a 10-second test, play it back, and listen for hiss, echo, and rubbing before you film a full batch.
- Record room silence. A few seconds of quiet at the start helps your editor clean up background hum.
Some newer iPhones include built-in features like wind noise reduction and an Audio Mix option that can help bring voices forward after recording. These help, but a mic close to your mouth will always sound better.
Three Setups for Three Situations
The desk setup
For owners who film from their office: an LED panel on a desk arm or small stand to one side, a wireless clip-on mic, a phone stand at eye level, and a warm lamp in the background. Compact, fast, and great for coaching and explainer videos.
The studio corner setup
For a dedicated filming spot: two softboxes (one main light, one dimmer fill), a background light, a full-height tripod, and a two-person wireless mic kit for interviews. This is close to what we bring on a shoot day.
The on-location setup
For contractors, real estate agents, and anyone filming out in the field: a small battery-powered LED light, a wireless clip-on mic with windscreen, and a compact tripod or handheld stabilizer. Use daylight as your main light and the LED to fill shadows.
Mistakes to Avoid
- Lighting from directly above. Ceiling lights create dark eye sockets and look tired.
- Bright window behind you. You become a silhouette.
- Mixing light colors. Warm lamps plus cool LEDs plus daylight equals odd skin tones. Set your lights to match.
- Mic too far away. A mic on a table across the room is not much better than the phone mic.
- Not testing. Five minutes of testing saves an entire wasted shoot.
- Buying everything at once. Start with one light and one mic. Add more only when you know what you need.
Once your gear is set, the next step is getting the camera settings right. Our guide on how to film professional videos with your iPhone covers resolution, focus lock, and framing. And to get the most out of one setup, read about batch creating social media content.
Frequently Asked Questions
What are the recommended lighting kits for phone video recording?
For most talking-head videos, a softbox kit or an LED panel with a diffuser on a stand is the best starting point. Add a small background light if you have room. Ring lights work well for close-up beauty content, and small pocket LEDs are handy for filming on the go.
What is the best mic for iPhone video?
For most business owners, a wireless clip-on mic system is the best choice because it is clear, reliable, and lets you move. Popular examples include the DJI Mic series, RODE Wireless GO kits, and Hollyland Lark mics. Check that the receiver fits your phone's port (USB-C on newer iPhones, Lightning on older ones).
Ring light vs softbox: which is better for YouTube and Reels?
A softbox usually looks more natural for talking-head videos because it lights your face from the side and shows its shape. A ring light gives flat, even light that works well for makeup and close-ups. If you wear glasses, a softbox placed off to the side is usually easier to manage.
Do I need two lights for talking-head videos?
No. One good soft light placed correctly is enough to start. A second dimmer light or a white wall can soften shadows on the other side of your face, and a background light adds depth, but they are optional.
Can I use natural light instead of buying lights?
Yes. A large window with soft daylight is one of the most flattering lights there is. Face it or sit at a slight angle to it. The downside is that it changes throughout the day, so for long filming sessions a softbox or LED panel gives more consistent results.
Is the iPhone's built-in mic good enough?
It can work for quick clips filmed close to your face in a quiet room. For anything more than an arm's length away, or in a room with echo, an external mic will make your voice sound much clearer and more professional.
Skip the Gear Shopping Entirely
Getting your lighting and mic right is one of the best investments you can make in your content. But if you would rather not buy, set up, and test gear at all, our team handles it for you. Social Content Masters brings the lights, mics, and cameras, films a month of content in one shoot day, then edits and posts it for you.
Want to see what that looks like for your business? Book a free content strategy session and we will walk you through the plan.
Want content like this made for your brand?
We script, film, edit, and post. You get your time back.
Book a Consultation